The most practical gluten-free meal prep approaches are batch-cooking proteins and vegetables for mix-and-match bowls, making no-cook breakfasts like overnight oats, and building a freezer stock of one-pot meals like stews or curries. Each method cuts daily cooking time and keeps gluten-free options within reach throughout the week.
This guide covers more than ten prep methods with instructions and variations to reduce last-minute meal decisions. You'll find batch-cooked protein bowls, grain-based salads, sheet pan dinners, and ready-to-grab breakfasts.
Each method includes practical details: prep times, serving sizes, and estimated macronutrient profiles. Storage and reheating tips are included to keep food in good shape through the week.
Gluten-free eating often overlaps with other dietary goals, so each method includes variations for weight loss, muscle gain, and vegan diets. Whether you're a busy professional, tracking macros, or just trying to spend less time in the kitchen, these ideas give you a workable framework for a week of pre-planned meals.
How can I batch-cook proteins and vegetables?
Batch-cooked protein and vegetable bowls work well for gluten-free meal prep because you prepare large quantities of individual components, proteins, vegetables, and grains, then mix them into different meals throughout the week. Rather than making five identical chicken and rice bowls, you build a "food bank" in your fridge and assemble whatever combination you want in minutes. This suits busy professionals and fitness enthusiasts who need consistent, macro-friendly meals but want variety day to day.
How does this method work?
The idea is to separate cooking from assembly. On your prep day (typically Sunday), you cook 2-3 types of protein (e.g., grilled chicken breast, baked salmon, ground turkey) and several trays of roasted vegetables (e.g., broccoli, bell peppers, sweet potatoes). You also prepare a gluten-free grain or base, like quinoa or brown rice. Store each component in its own large container.
Each day, you simply scoop your desired portions into a bowl, creating a fresh combination. For example:
- Monday:Grilled chicken + roasted broccoli + quinoa.
- Wednesday:Grilled chicken + roasted bell peppers + sweet potato chunks.
- Friday:Baked salmon + roasted broccoli + quinoa.
Tips for success
A few things make this method work well:
- Separate Storage is Key:Always store proteins, vegetables, and grains in separate airtight containers. This prevents sogginess and keeps each component fresh for up to five days.
- Season Components, Not the Bowl:Season your proteins and vegetables generously during cooking. Wait to add sauces or dressings until you assemble your meal to prevent ingredients from becoming watery.
- Plan Your Pairings:While the method is flexible, having a rough idea of your weekly combinations helps with grocery shopping and ensures a balanced intake of nutrients.
- Use Your Oven Wisely:Roast multiple trays of different vegetables at the same temperature to save time and energy. You can often cook a protein like salmon on another rack simultaneously.
What are some good make-ahead gluten-free lunches?
Gluten-free grain and legume salads make good make-ahead lunches: they're filling, need no reheating, and hold up for several days in the fridge. This approach combines naturally gluten-free grains like quinoa or millet with legumes such as chickpeas or lentils, plus fresh vegetables and a vinaigrette. Eaten cold, they work well for office lunches or on-the-go meals, and the flavor often improves after a day in the dressing.
How does this method work?
The goal is to build a salad base that holds up after a day or two in the fridge without wilting or going soggy. Start by cooking a gluten-free grain and a legume, and let them cool completely. Toss with sturdy, chopped vegetables like cucumbers, bell peppers, and red onions. An acid-based dressing mixed in early helps tenderize the components and develop flavor over time.
You can create different flavor profiles each week with simple swaps:
- Mediterranean Quinoa Salad:Combine quinoa, chickpeas, cucumber, tomatoes, and a lemon-herb vinaigrette.
- Lentil Power Salad:Mix cooked green or brown lentils with shredded carrots, red onion, and a zesty tahini dressing.
- Southwestern Millet Salad:Use millet as a base with black beans, corn, bell peppers, and a cilantro-lime dressing.
Tips for success
To keep your grain salads crisp and flavorful through the week:
- Store Dressing Separately for Longevity:If you plan to eat the salads beyond day three, store the dressing in a separate container and add it just before serving to maintain maximum freshness.
- Toast Your Grains:For a deeper, nuttier flavor, toast grains like quinoa or millet in a dry pan for a few minutes before cooking them in water or broth.
- Hold the Delicate Greens:Add tender greens like spinach or arugula on the day you plan to eat the salad. Mixing them in during prep will result in a wilted texture.
- Use Acid-Based Vinaigrettes:Dressings with a vinegar or citrus base help preserve the vegetables and keep them crisp, unlike creamy dressings which can cause sogginess.
- Add Crunch Last Minute:To maintain their texture, add crunchy elements like nuts, seeds, or gluten-free croutons right before you eat.
Which meal prep method is best for freezer meals?
Slow cooker and Instant Pot meals require minimal active cooking and produce large batches of hearty dinners. Stews, curries, and chilis are often naturally gluten-free and work well with this approach. Portioned and frozen, these one-pot meals give you a stockpile of ready-to-heat dinners that cover busy weeknights without last-minute scrambling.
How does this method work?
The approach uses a slow cooker or pressure cooker (like an Instant Pot) to combine proteins, vegetables, and gluten-free liquids in a single pot that cooks over several hours or under pressure. On prep day, you add all your ingredients, set the timer, and let the appliance do the work. Once cooked, the meal is cooled, portioned into freezer-safe containers, and stored for future use.
This makes it one of the more practical options for long-term planning:
- Week 1:Enjoy a portion of freshly made Thai Red Curry. Freeze the remaining 5-7 portions.
- Week 3:Thaw a portion of the curry for a quick dinner with no cooking required.
- Week 5:Pull out a serving of the Beef Stew you made a month prior.
Tips for success
To get the most flavor and shelf life from your one-pot gluten-free meals:
- Brown Your Meat First:Searing beef, chicken, or pork in the pot before adding liquids builds a deeper flavor base through the Maillard reaction. It's a simple step that makes a noticeable difference in the final dish.
- Layer Your Ingredients:Place firm root vegetables like potatoes and carrots at the bottom, closer to the heat source. Place your protein on top, followed by more delicate ingredients.
- Add Greens at the End:To prevent delicate vegetables like spinach, kale, or broccoli from becoming mushy, stir them in during the last 20-30 minutes of slow cooking or after pressure cooking is complete.
- Cool Completely Before Freezing:Let the meal cool to room temperature before portioning and freezing. This prevents ice crystals from forming, which can ruin the texture upon reheating. Always label containers with the meal name and date.
What can I meal prep for a high-protein gluten-free breakfast?
Egg-based dishes work well for gluten-free breakfast meal prep: they're high in protein and easy to batch. This method involves making frittatas, baked egg muffins, or portioned scrambles that you can grab and reheat throughout the week. One prep session covers breakfasts for several days, which suits busy professionals and fitness enthusiasts who need a quick morning meal without daily cooking.
How does this method work?
The idea is to bake or cook egg-based meals in formats that portion and store well. On prep day, you combine eggs with vegetables, cheeses, and proteins, then bake in a large dish (for a frittata) or individual muffin tins (for egg cups). Once cooled, divide them into single servings and store in the fridge or freezer.
Here’s how you can apply this throughout the week:
- Monday:Two spinach and feta egg muffins with a side of fruit.
- Wednesday:A slice of a pre-made vegetable frittata, microwaved for 60 seconds.
- Friday:A portioned container of turkey sausage and vegetable scramble, reheated quickly.
Tips for success
A few techniques make egg-based meal prep more reliable:
- Pre-Cook Your Veggies:Sauté or roast vegetables like mushrooms, onions, and bell peppers before adding them to your egg mixture. This removes excess moisture and prevents a watery final product.
- Use Silicone Liners:When making egg muffins, use silicone liners or grease your muffin tin generously. This ensures the muffins release easily without sticking or falling apart.
- Cool Completely Before Storing:Allow frittatas and egg muffins to cool completely on a wire rack before you slice and store them. This helps them set properly and prevents them from breaking.
- Layer with Parchment Paper:To prevent sticking, place a small square of parchment paper between stacked frittata slices or layers of egg muffins in your airtight container. Many of these high-protein, low-carb breakfast ideas align with ketogenic principles.
How do I make my meal prep less boring?
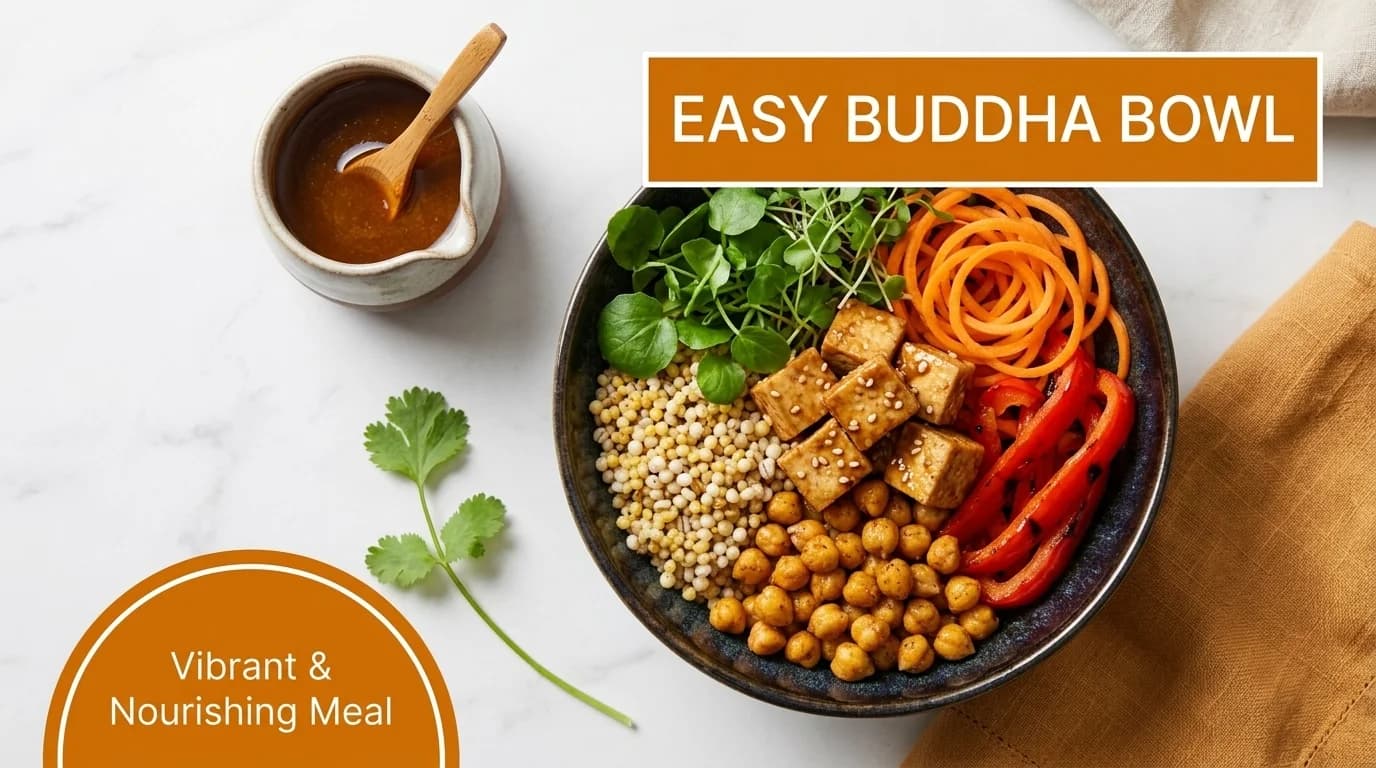
Buddha bowls built around vegetables work well as a weekly meal prep base. Vegetables make up at least half the bowl, with the rest split between a gluten-free grain and a lean protein. Preparing several distinct sauces at the start of the week keeps the same base components from feeling repetitive day to day.
How does this method work?
Variety comes from the sauces. Prep day involves creating a "bowl bar" of components: roasted and raw vegetables, a cooked gluten-free grain (like quinoa or millet), and a protein (like chickpeas or shredded chicken). You also make 2-3 different sauces, such as a creamy tahini dressing, a spicy peanut sauce, and a cilantro-lime vinaigrette. Each goes into its own airtight container.
Each day, you assemble a bowl and pick a different sauce. For example:
- Monday:Quinoa + roasted chickpeas + cucumber + tomato + creamy tahini sauce.
- Wednesday:Quinoa + shredded chicken + shredded carrots + edamame + spicy peanut sauce.
- Friday:Quinoa + black beans + roasted peppers + corn salsa + cilantro-lime vinaigrette.
Tips for success
Focus on texture, freshness, and smart storage:
- Sauce is Boss:Prepare sauces in glass jars with tight-sealing lids; they last up to a week. A good sauce turns a simple bowl into something worth eating again tomorrow.
- Strategic Layering:When packing your bowl, place hearty grains and proteins at the bottom, followed by sturdy vegetables, and finish with delicate greens on top to prevent wilting.
- Pack Dressing Separately:Always store your sauce in a small, separate container. Add and toss it just before eating to keep everything crisp and fresh.
- Add Crunch Last:Toasted nuts, seeds, or gluten-free croutons provide essential texture. Pack them separately and sprinkle them on top right before you eat. For more plant-centric meal ideas, you can explore additionalvegetarian meal plans.
Are there any good gluten-free casserole ideas?
Gluten-free pasta bakes reheat well and require no daily assembly. This method involves layering gluten-free pasta, protein, vegetables, and sauce in a large baking dish, then baking and portioning for the week. One batch covers multiple servings and holds up well in both the fridge and freezer. It works particularly well for families and individuals who want a filling, oven-ready meal without much weeknight effort.
How does this method work?
The process focuses on making one large-batch dish that divides into multiple servings. On prep day, cook your gluten-free pasta, prepare your protein and vegetables, and mix everything with a sauce in a large baking dish. After baking, let it cool completely before portioning into individual containers for the refrigerator or freezer.
The baked format lets flavors meld throughout every bite. Popular combinations include:
- Gluten-Free Baked Ziti:GF pasta with ground turkey, marinara, and ricotta layers.
- Creamy Spinach & Chicken Casserole:GF penne, cooked chicken, spinach, and a simple GF béchamel sauce.
- Roasted Vegetable Lasagna:GF lasagna sheets layered with roasted zucchini, eggplant, tomato sauce, and mozzarella.
Tips for success
A few details make the difference with pasta bake meal prep:
- Slightly Undercook the Pasta:Boil your gluten-free pasta for 1-2 minutes less than the package directions. It will absorb moisture from the sauce and finish cooking in the oven, preventing a mushy texture.
- Use Less Sauce:Use about 20-30% less sauce than you normally would for a freshly served pasta dish. This prevents the casserole from becoming watery upon reheating.
- Cool Completely Before Storing:Let the casserole cool to room temperature before covering and refrigerating. This minimizes condensation, which is the main cause of sogginess.
- Reheat for Best Results:For oven reheating, cover with foil and bake at 350°F (175°C) for 20-25 minutes, then uncover for the last 5 minutes to crisp the top. This provides much better results than microwaving.
What's the fastest way to prep gluten-free breakfasts?
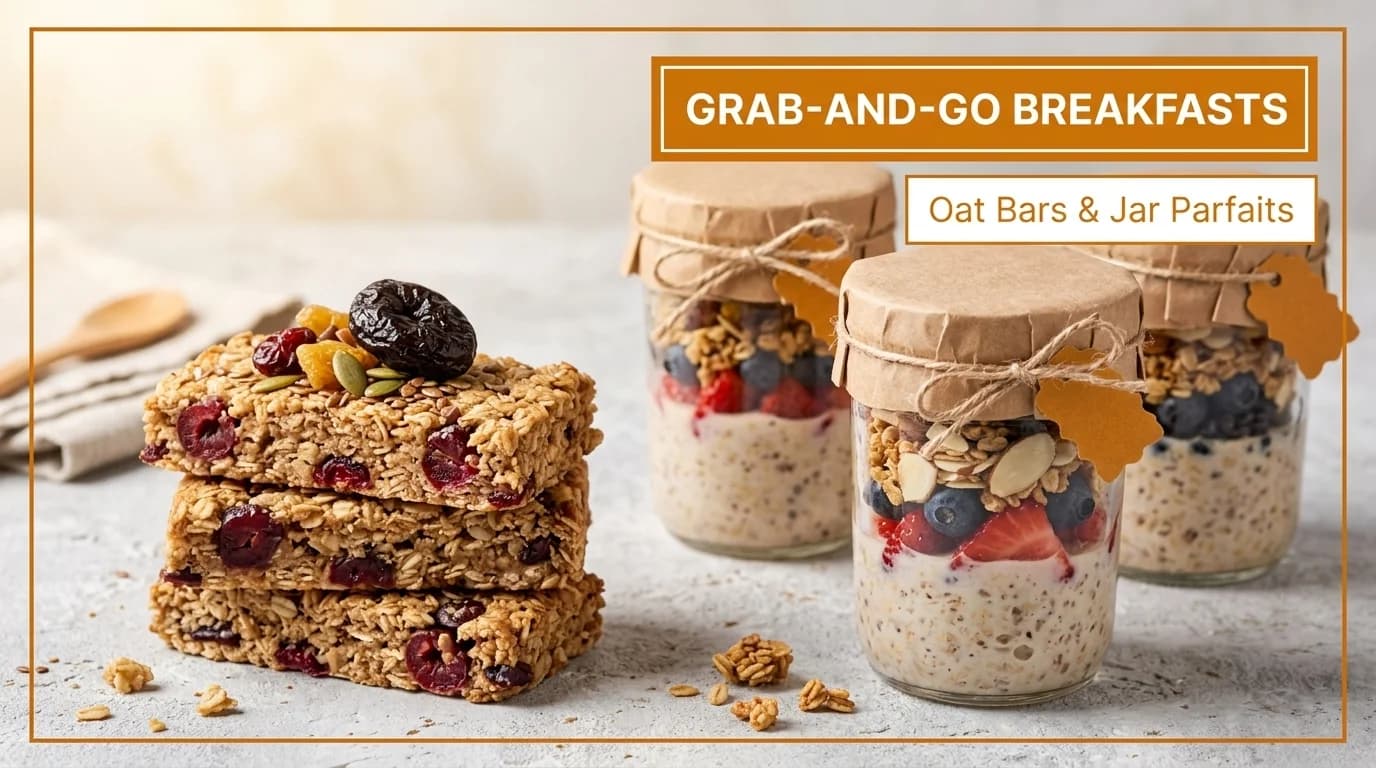
Grab-and-go gluten-free breakfasts are pre-portioned, no-cook, or batch-baked options prepared in advance so each morning you just open the fridge and eat. Items like overnight oats, chia puddings, and baked bars take minimal effort upfront and are ready throughout the week. This works well for busy professionals, parents, and fitness enthusiasts who need a portable, satisfying morning meal.
How does this method work?
A short prep session at the start of the week covers your breakfasts for days. For no-cook options like overnight oats or chia pudding, you combine certified gluten-free oats or chia seeds with a liquid (like almond milk), a protein source (Greek yogurt or protein powder), and flavorings in individual jars. For baked options, you mix ingredients for bars or muffins and bake them in one large batch.
Each morning, you grab a jar or a bar from the fridge. Examples include:
- Chocolate Peanut Butter Overnight Oats:GF oats, almond milk, peanut butter, cocoa powder, and chia seeds layered in a jar.
- Berry Chia Seed Pudding:Chia seeds, coconut milk, vanilla extract, and mixed berries combined and chilled.
- Almond Flour Breakfast Bars:A baked mixture of almond flour, eggs, maple syrup, and chopped nuts.
Tips for success
A few things make grab-and-go gluten-free breakfasts work consistently:
- Use Mason Jars:A 16-ounce mason jar provides the perfect ratio of liquid to solids for overnight oats and chia pudding, preventing a soupy or dry texture.
- Layer Smartly:When making jars, place wet ingredients like yogurt or fruit puree at the bottom, followed by oats and liquids. Add crunchy toppings like nuts or granola just before serving to maintain texture.
- Freeze Baked Goods:Batch-bake bars, muffins, or energy squares and freeze them. Lay them on a baking sheet to freeze individually before transferring them to a freezer bag to prevent sticking.
- Boost the Protein:Add a scoop of gluten-free protein powder to oat or chia mixtures, or stir it into baked good batter, to increase protein content and improve satiety.
What is the easiest gluten-free meal prep idea?
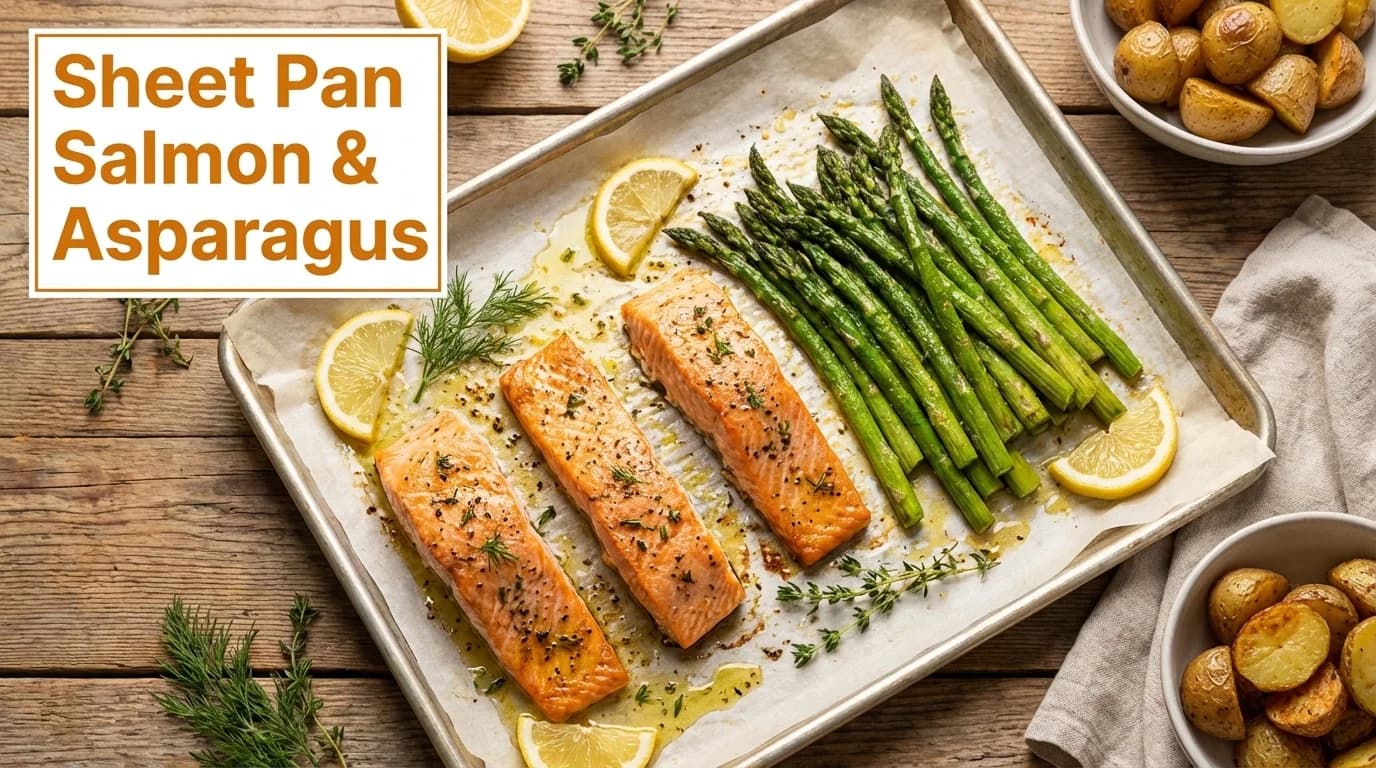
Sheet pan and skillet meals involve cooking protein and vegetables together in one pan. The flavors develop as they roast, and cleanup is minimal. This works well for busy weeknights and for anyone who dislikes washing multiple pots and pans. The approach also fits naturally within a Paleo diet, which you can explore further with acustomized meal plan.
How does this method work?
The concept is simple: combine a protein source and chopped vegetables on a single sheet pan or in a large cast-iron skillet, toss with oil and seasonings, and cook in the oven or on the stovetop. Once cooked and cooled, the entire meal is portioned into individual containers. This method saves time not only in cooking but also in assembly, as the components are already mixed.
Popular one-pan combinations include:
- Mediterranean Salmon:Salmon fillets + asparagus + cherry tomatoes + red onion + lemon.
- Fajita-Style Skillet:Ground beef or chicken + bell peppers + onions + fajita seasoning.
- Herb Roasted Turkey:Ground turkey + sweet potato chunks + Brussels sprouts + thyme.
Tips for success
A few details make a consistent difference with sheet pan meal prep:
- Pat Proteins Dry:Always pat your protein (chicken, salmon, etc.) dry with a paper towel before seasoning. This removes excess moisture and promotes a better sear and browning.
- Use Parchment Paper:Line your sheet pans with parchment paper for non-stick cooking and incredibly easy cleanup.
- Stagger Your Ingredients:Add vegetables based on their cooking time. Hard, dense root vegetables like potatoes and carrots should go in first, followed by softer vegetables like broccoli and bell peppers later.
- Don't Overcrowd the Pan:Spread ingredients in a single layer with space between them. Overcrowding will cause the food to steam instead of roast, preventing it from getting crispy. Use two pans if necessary.
How can I prep healthy gluten-free snacks?
A gluten-free snack prep station involves preparing and portioning grab-and-go items at the start of the week. Rather than leaving between-meal eating to chance, you set up a "snack bank" with individually portioned vegetable crudités, dips, energy balls, and roasted chickpeas. Having options already portioned reduces impulse decisions and keeps eating consistent through the day.
How does this method work?
The method is straightforward: pre-portion a variety of snacks and sides at the beginning of the week so they're ready to grab from the fridge or pantry. On prep day, you chop vegetables, make dips, roll energy balls, and divide nuts or seeds into single-serving containers. When hunger hits mid-afternoon, the work is already done.
Examples of a well-stocked station include:
- Protein Balls:Combine dates, almonds, cocoa powder, and sea salt in a food processor, then roll into bite-sized balls.
- Roasted Chickpeas:Toss canned chickpeas with paprika and garlic powder, then roast until crispy for a shelf-stable, crunchy snack.
- Vegetable & Dip Packs:Portion hummus or guacamole into small containers and pair with bags of pre-cut carrots, bell peppers, and celery sticks.
Tips for success
A few details keep your snack station running well through the week:
- Keep Vegetables Crisp:Store pre-cut vegetables like carrots and celery with a folded paper towel in an airtight container to absorb excess moisture and prevent them from becoming limp.
- Prevent Oxidation:Add a squeeze of lemon or lime juice to cut fruit like apples or to guacamole. This slows down the browning process and keeps them looking fresh.
- Portion Control Matters:Use small glass containers or reusable silicone bags to pre-portion items like nuts, seeds, and dips. A standard portion is often ¼ cup for nuts or 2 tablespoons for dips.
- Label Everything:Clearly label each container with its contents and the preparation date. This helps you track freshness and consume items in the right order; most fresh-cut vegetables should be eaten within four days.
Can I freeze gluten-free protein for later?
A freezer stash of seasoned meatballs and sausage patties gives you quick, high-protein meal components on demand. The method involves batch-preparing seasoned ground meat, shaping it into uniform portions, and freezing for future use. Rather than cooking protein from scratch every night, you pull from a ready-made base that works in sauces, stir-fries, or breakfast plates, which suits both fitness enthusiasts and busy families.
How does this method work?
All the seasoning, mixing, and shaping happens once on prep day. You prepare one or more ground meat mixtures, such as Italian-style beef meatballs, turkey breakfast sausage, or Asian-inspired pork meatballs, form them into golf ball-sized portions, bake on a sheet pan until just cooked, then freeze. From that point they reheat quickly and drop into almost any meal.
Here’s how you can use them throughout the week:
- Monday:Reheat Italian meatballs in a gluten-free marinara sauce to serve over zucchini noodles.
- Wednesday:Sauté the turkey sausage patties with eggs and a side of avocado.
- Friday:Add Asian pork meatballs to a stir-fry with broccoli and gluten-free tamari sauce.
Tips for success
A few techniques make a real difference when batch-prepping ground meat:
- Handle with Care:Mix your ground meat gently and only until the ingredients are combined. Overmixing creates tough, dense meatballs. A good ratio is one egg and a half-cup of gluten-free breadcrumbs per pound of meat.
- Freeze in a Single Layer:After baking, place the meatballs or patties on a parchment-lined baking sheet and freeze for 2-3 hours. Once solid, transfer them to a freezer-safe bag. This prevents them from sticking together in a large clump.
- Cook from Frozen:There is no need to thaw before cooking. Simply add the frozen meatballs or patties directly to a simmering sauce or a hot pan, adding 5-10 minutes to the total cooking time.
- Ensure Uniformity:Use a cookie scoop or a scale to keep all portions a similar size. Even sizing means they cook at the same rate and makes tracking macros more reliable, which is useful for anyone following ahigh-protein meal plan.
Which gluten-free meal prep idea should I choose?
| Meal Prep Method | Complexity | What you need | What you get | Best for | Top advantages |
|---|---|---|---|---|---|
| Batch-Cooked Protein & Vegetable Bowls | Low — separate cooking + simple assembly | Moderate — oven/stovetop, many containers, fridge space | Consistent macros, reduces waste, 4–5 day freshness | Busy professionals, macro tracking, weeknight variety | ⭐ Portion control, time saved, flexible mix-and-match |
| Gluten-Free Grain & Legume-Based Salads | Low–Medium — cook grains/legumes, assemble cold | Low — pots, jars, fridge; minimal freezer | High fiber/satiety, stable flavor 2–5 days | Vegan/vegetarian lunches, blood-sugar control, budget meals | ⭐ Nutrient-dense, budget-friendly, flavors improve over time |
| Slow Cooker / Instant Pot One-Pot Meals | Low — set-and-forget after short prep | Moderate — slow cooker/Instant Pot, significant freezer space | Nutrient-dense broths, freezer-stable 4–8+ weeks | Monthly batch cooks, minimal active time, chronic-condition diets | ⭐ Cost-effective, tenderizes cheap cuts, long-term storage |
| Egg-Based Breakfast & Brunch Meal Prep | Low — bake/portion eggs; simple techniques | Low — oven, containers, optional freezer | High satiety & complete protein; 5 days refrigerated, months frozen | Quick protein breakfasts, fitness enthusiasts, keto/paleo | ⭐ Complete protein, inexpensive, fast reheating |
| Vegetable-Forward Buddha Bowls with Rotating Sauces | Medium — chopping + multiple sauces to prep | Moderate — jars, multiple sauce containers, fridge space | High micronutrient density; 5-day freshness with sauce separation | Health-conscious eaters, sustainability-focused, flavor variety seekers | ⭐ High veg intake, highly customizable, sauce-driven variety |
| Gluten-Free Pasta & Vegetable Bake Casseroles | Medium — layering and baking; slight technique | Moderate — oven space, baking dishes, freezer | Comforting, filling meals; fridge 4–5 days, freezer 8+ weeks | Families, comfort meals, batch feeding for reheats | ⭐ Single-dish convenience, family-friendly, flavors intensify overnight |
| Grab-and-Go GF Breakfasts (Overnight Oats, Chia, Bars) | Low — no-cook jars or single-batch baking | Low — jars, basic baking tools, fridge/freezer | Portable, macro-trackable breakfasts; 4–8+ day shelf / frozen longer | Commuters, gym-goers, busy mornings | ⭐ Very quick prep, portable, easy macro adjustments |
| Sheet Pan & Skillet Proteins with Roasted Vegetables | Low — one-pan cooking; timing nuance for veggies | Low — sheet pan or skillet, oven | Balanced meals, 4–5 day fridge life, minimal cleanup | Quick dinners, minimal dishwashing, budget-friendly meals | ⭐ Simple prep, rich caramelized flavor, low cleanup |
| Gluten-Free Snack & Sides Prep Station | Low–Medium — portioning and rotation planning | Moderate — many small containers, fridge space | Improved snacking consistency; prevents impulse eating | Between-meal hunger control, office snacks, portion control | ⭐ Pre-portioned convenience, better satiety, varied options |
| Freezer-Friendly GF Meatballs & Sausage Patties | Medium — mix/form/freeze single layer; some technique | Moderate — baking sheets, freezer space, storage bags | High-protein portions, versatile meals, 8+ week freezer life | Protein-focused diets, quick meal components, family meals | ⭐ Protein-dense, highly versatile pairings, long freezer storage |
How can I make gluten-free meal prep a habit?
The methods above cover a range of gluten-free meal prep approaches, from protein bowls to grab-and-go breakfasts. Having food ready in advance makes gluten-free eating more consistent and less stressful during the week.
Each method offers a framework for building balanced meals, managing prep time, and adjusting for different goals, whether that means weight loss, muscle gain, or simply having safe, ready-to-eat food without cross-contamination concerns.
Where to start
Pick one or two methods that fit your current routine and start there.
- If you’re pressed for time:Sheet pan dinners or slow cooker one-pot meals keep active cooking to a minimum and produce multiple servings from a single session.
- If you want more variety:Buddha bowls with rotating sauces let you use the same base components throughout the week while keeping each meal tasting different.
- If you need grab-and-go options:A batch of overnight oats, chia puddings, or a pre-portioned snack station takes under an hour to set up and covers breakfast and snacks for the whole week.
Component prepping removes the pressure of assembling full meals each time. Having cooked quinoa, roasted vegetables, and a pre-made vinaigrette in your fridge gives you enough to eat differently each day without additional cooking.
Cross-contamination is also part of the picture during meal prep. If your kitchen is shared, use a separate cutting board and colander for gluten-free foods. Wash hands thoroughly between handling different items, and prepare gluten-free components first before anything else goes on the counter. Labeling containers with "GF" removes any guesswork later when someone else is reheating food.
Key Takeaway:Consistency matters more than complexity. A simple, repeatable routine produces better results than an elaborate plan that’s difficult to maintain week to week.
What are the main benefits of meal prepping?
Gluten-free meal prep reduces daily decision-making and makes it less likely you'll reach for processed convenience foods. When safe, ready-to-eat meals are already in the fridge, the path of least resistance is already a good one.
Beyond food quality, regular prep saves time, lowers grocery costs through better planning, and removes the stress of figuring out what to eat after a long day. For people managing celiac disease or gluten sensitivity, having pre-prepared meals also reduces the risk of cross-contamination from last-minute cooking.
Frequently Asked Questions
How long does meal prep last in the fridge?Most gluten-free meal prepped dishes last for 3-5 days in the refrigerator when stored in airtight containers.
Is it better to freeze or refrigerate meal prep?Refrigerate meals you plan to eat within 4 days for the best texture and flavor. Freeze meals like stews, casseroles, and meatballs for long-term storage up to 3 months.
What's the best container for meal prep?Glass containers are ideal as they are non-porous, don't stain, and can be used in the oven, microwave, and freezer.
Can I meal prep salads?Yes, prepare hearty salads using sturdy greens and grains, but always store the dressing separately to prevent sogginess.
How do I avoid getting bored with meal prep?Focus on "component prepping" by making separate proteins, veggies, and grains, then mix and match them with different sauces throughout the week.
Do I need special equipment for gluten-free meal prep?No, you only need basic kitchen tools like airtight containers, a good knife, baking sheets, and pots. A slow cooker or Instant Pot can make the process easier but isn't required.
Can I use the same containers for both gluten-free and regular food?Glass containers are safe as long as they are washed thoroughly between uses. Plastic containers can hold onto odors and residue more stubbornly, so it's worth keeping a dedicated set for gluten-free food if you share a kitchen with people who eat gluten.
How do I keep gluten-free grains from going mushy when reheating?Add a tablespoon of water before microwaving and cover loosely to trap steam. For rice and quinoa, fluff with a fork after heating. Avoid reheating grains more than once, as repeated heating makes the texture noticeably worse.